The Four Types of Fittings
Although there is no one correct way to install plumbing, some fitting types offer unique advantages over others. In today’s blog, I will showcase four different fitting types. Furthermore, I will give my advice on which is the best fitting for copper pipe, though the best connection will be dependent on circumstances discussed later in the post.
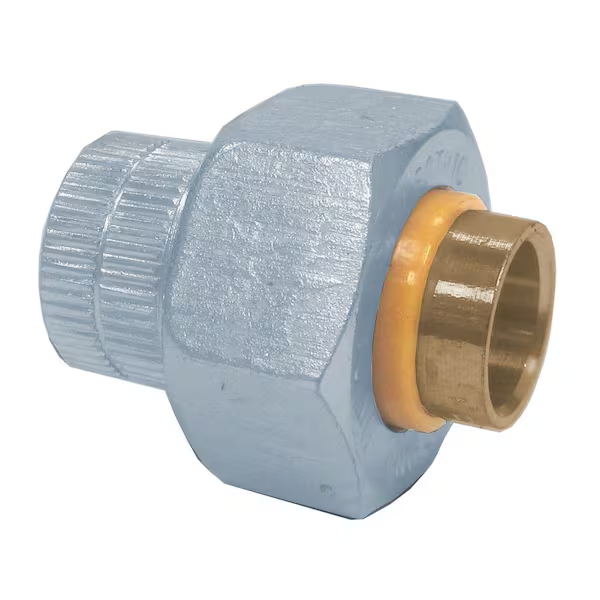
The Dreaded Dielectric Union Topic
Before the four methods of installing copper plumbing are discussed, I must talk about dielectric unions. I titled this section as dreaded because the topic of dielectric unions is very opinionated. I have read that hot water manufacturers require dielectric unions for warranty, but I have also read that they serve little purpose.
Likewise, I have read from people online that dielectric unions rarely fail, and yet also have read that they always end up failing. From my personal experience, I have seen a dielectric union be completely fine on the cold line part of my water tank and yet fail on the hot water line.
With my lack of formal training in the plumbing trade, I chose to skip using a dielectric union when it was time to fix a leak on my water tank. I do believe a dielectric union done by a professional poses no issue, however, with the nipple themselves being dielectric, I also believe that the union is not necessary.
Moving forward, a few of the methods below will be compatible with a dielectric union. Since I am not an expert, and I have never installed a dielectric union, I will not be going into detail about installing a dielectric union in any of the four methods. Rather, I will only state whether the method is compatible or not with a dielectric union.
Now onto Method One: So Many Sharkbites
The first step for me was to remove the old nipple and to replace it with a new one. The dialectic union leaked and basically welded onto the old nipple. The first step is also an optional step, depending on circumstances, and could be applicable to any of these methods.
The photo is my old hot water line, where the person used a dielectric union (I would use the 1/2 inch Sharkbite FIP mentioned below).

Prices may vary based on time viewed and location, but to get a general idea of cost, let us break down the cost of supplies. The Sharkbite FIP costs $9.00, the shut-off valve costs $23.00, and the copper pipe costs $11.00. The total cost of supplies is $43.00. This method is compatible with a dielectric union.
Pros
— No specialized Sharkbite fitting required.
— The Sharkbite fittings are more accessible than method two.
— Sharkbites are removable.
— Sharkbite does not need installation tools like a torch or crimper.
Cons
— Not as straightforward as method Two.
— Reputation of Sharkbites is mixed could make home value less
Method Two: Sharkbite Lite
The approach I went with is a modified take on method one but was designed to reduce the amount of fail points. However, after installing the Sharkbite, a leak formed where the arrow is in the photo due to the Sharkbite not being tight enough on the nipple. So, while I thought that using a single Sharkbite would reduce the amount of fail points, this simply was not true.
The method I chose was to use a dedicated Sharkbite for hot water tank lines. Method two is more straightforward than the first method because only one fitting was needed versus the two of method one (also no copper pipe was needed).
While method two is simpler, not everyone will be aware that Sharkbite makes specialized fittings. Furthermore, the specialized fittings are only applicable in some circumstances, such as the case with my hot water line repair.

The total cost for supplies was $36.00. This method is incompatible with a dielectric union.
Pros
— Most straightforward method.
— The Least amount of skill required.
— Sharkbite is Removable.
— Sharkbite does not need installation tools like a torch or crimper.
Cons
— Not available at all hardware stores
— The reputation of Sharkbites is mixed.
Method Three: Propress Fittings
I had initially written positively about the price of Propress before fully looking into the cost. I had a general idea of how much fittings cost, but was not aware of the cost for the shut-off ball valve.
Typically, the cost of Propress fittings are cheaper than that of Sharkbite. For example, the Propress 1/2 FIP is $5.00 cheaper than the Sharkbite version.
But the Propress shut-off valve is pricey at $28.00, making this specific repair the same amount as the Sharkbite. For other repairs, the Propress should be the cheaper of the two methods.
A disadvantage of the Propress method is the cost of the tool that crimps the fittings. Electric tools cost thousands of dollars, and even a manual operated crimper is over 150 dollars. The tool is worth the price if multiple repairs are needed, but for one simple fix, the 150 dollars is a lot to ask.

For the price of this method, I will exclude the tool cost, simply because it will be harder to compare directly against the other options. The Propress FIP fitting costs $4.00, The shut-off valve is $28.00, and the copper is $11.00. The total cost for the Propress fittings is $43.00. This method is compatible with a dielectric union. The photo above is from a TikTok channel called @plumberjohnn.
Pros
— Looks more professional than Sharkbite.
— Easier and quicker to install than solder.
— Propress can be cheaper than Sharkbite depending on fittings required.
Cons
— Initial cost is high due to tool cost.
— Still relies on a rubber seal.
— Costs the same as method one.
— Not as desirable as soldered connections.
Method Four: Good Old Solder
As someone who has previously tried to solder copper pipes, I do not like this method. Soldering is the least likely to fail (if installed right), so it has a good reason to be on this list.
For a do-it-yourself home repair, the method is not one I would recommend. Working with fire can be extremely dangerous and can leave solder in the water lines if done wrong.

The 1/2 copper FIP is $4.00, the copper is $11.00, and the shut-off valve is $15.00. The total cost for solder fittings is $30.00 or $6.00 cheaper than the previously cheapest method. This method is compatible with a dielectric union.
Pros
— Most durable connection.
— Cheapest of the four methods.
— Will look the most professional.
Cons
— Requires the most amount of skill.
— Solder can fail if not done correctly.
— Because of an open flame needed, there is a fire risk.
— Takes the most amount of time.
— Need Torch and Solder which offsets any savings.
A look at the “Best Method”
As shown in the pictures, I chose method two and while it works, I may have done things differently in retrospect. One reason I went with method two was because of the urgency of the repair. I was searching for a fix that was straightforward and quick but did not want as many fail points as option one.
After doing the repair, I realized that the method can still fail in unusual ways, such as highlighted by the arrow in method two’s picture. Due to the temperament of Sharkbite at times, I am going with Propress for a repair to my kitchen water line. In hindsight, I would have liked to stay consistent and done the water tank with Propress as well.
To summarize, Sharkbite is great for one-off repairs on newer homes, but with older homes, where more repairs are needed, I think investing in the Propress system is wiser. Propress fittings are just as easy as Sharkbite but are typically cheaper, look nicer, and have a strong crimp to ensure longevity. Lastly, I would only recommend solder connections if someone has the experience or is willing to learn how to solder.
A Few Disclaimers and Buy Me a Coffee
I have not had the chance to do a repair with Propress yet, and I am not sponsored by Propress or Sharkbite or any other company. After reviewing the methods, Propress fits the best into my future home repairs. If anyone has opinions on the matter, feel free to drop a comment.
As always, I do not run ads or take sponsorships. In return, I will ask for a small donation to my Buy Me a Coffee. The donation will help me buy tools and keep the blog running. Thanks for reading!